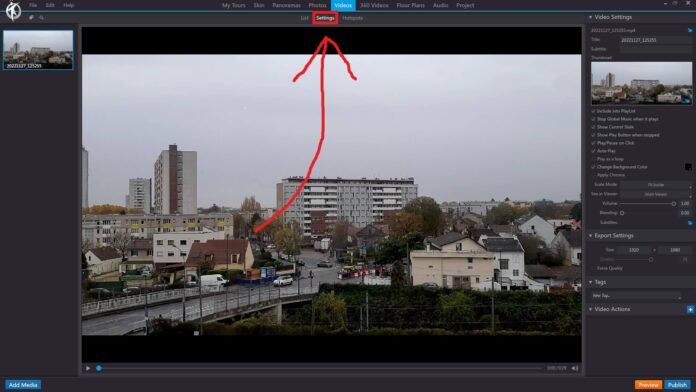
In 3DVista, the “Settings” option under the “Videos” section of the toolbar allows you to customize the behavior and appearance of the videos in your virtual tour project. By modifying these settings, you can create a more tailored viewing experience for your audience. Some features of the “Settings” option include:
Autoplay: You can enable or disable the autoplay feature, which controls whether the video starts playing automatically when the viewer navigates to the panorama containing the video.
Loop: This option allows you to set the video to loop continuously, ensuring that the video keeps playing without interruption when it reaches the end.
Mute: You can choose to mute the audio of the video by default, giving viewers the option to enable sound manually if desired.
Controls: You can decide whether to display video controls, such as play/pause, volume, and fullscreen buttons, allowing viewers to interact with the video during playback.
Aspect Ratio: You can set the aspect ratio of the video to maintain its original dimensions, stretch to fill the container, or fit within the container while preserving its aspect ratio.
Video Quality: You can specify the video quality (resolution) for different devices or internet connection speeds, ensuring smooth playback for all users.
Poster Image: You can select a custom poster image that displays before the video starts playing. This image acts as a placeholder that entices viewers to click and watch the video.
By adjusting the settings in the “Videos” toolbar in 3DVista, you can create a more engaging and customized video experience within your virtual tour projects.
