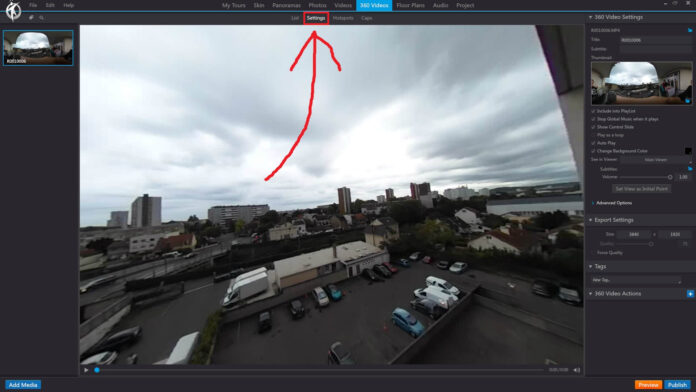
In 3DVista, the “Settings” option under the “360 Videos” section in the toolbar allows you to customize various settings for the selected 360-degree video within your project. These settings help you create a more engaging and immersive experience for the viewers of your virtual tour.
When you click on the “Settings” option with a 360-degree video selected, you’ll have access to the following options:
Video Playback: Adjust the video’s playback settings, such as autoplay, loop, and initial volume. You can also choose whether the video should start playing when the scene is loaded or when a specific action occurs (e.g., clicking a hotspot).
Video Quality: Set the video quality to be used in the project. You can choose between different resolutions and compression settings to optimize the video’s performance and loading times.
Initial View: Determine the initial view or camera angle that the user will see when the video starts playing. You can adjust the yaw, pitch, and field of view (FOV) to create a custom starting point for the video.
Spatial Audio: If your 360-degree video includes spatial audio, you can enable it here and adjust the settings for optimal audio performance.
Hotspots: Add and configure interactive hotspots within the 360-degree video. Hotspots can be used to trigger actions, such as navigating to other scenes, playing audio, or displaying additional information.
Filters & Effects: Apply visual filters and effects to the video, such as brightness, contrast, saturation, and blur. These adjustments can help enhance the appearance of the video and create a more visually appealing experience for the viewer.
Using the “Settings” option under the “360 Videos” section in the toolbar, you can fine-tune the presentation and interactivity of your 360-degree videos, providing an engaging and immersive experience within your virtual tours.
