In 3DVista, the “360 Videos” section in the toolbar allows you to add and manage 360-degree video content to create immersive virtual tours. Incorporating 360-degree videos into your projects can offer an engaging and interactive experience for your viewers. Here are some options and features available under the “360 Videos” section:
List: This option displays a list of all the 360-degree videos added to your project. You can easily select, edit, or remove videos from the list.
Settings: By clicking on “Settings,” you can access various options for customizing the appearance, playback, and interactivity of the 360-degree video. These options include video resolution, playback controls, auto-play, loop, and audio settings.
Hotspots: The “Hotspots” option allows you to create interactive elements within your virtual tour that link to your 360-degree video content. By adding 360 video hotspots, you can seamlessly integrate the video content into your virtual tour and enhance the overall user experience.
Audio: This option lets you add and manage audio tracks for your 360-degree videos, such as background music or voiceovers. You can control the audio playback settings, including volume, loop, and synchronization with the video.
Enhance: Under “Enhance,” you can find various tools to improve the visual quality of your 360-degree videos, such as brightness, contrast, saturation, and sharpness adjustments.
FX: The “FX” option allows you to apply various visual effects to your 360-degree videos, such as lens flares, color filters, and vignettes, to enhance their appearance and create a unique atmosphere.
The “360 Videos” toolbar in 3DVista is a powerful tool for integrating 360-degree video content into your virtual tours, providing a more immersive and dynamic experience for your audience.
Similar to the Panoramas feature, 360º Videos enables your to preview all imported 360º videos as well as hosts a range of tools that help create an interactive and appealing virtual tour. This area is used as a media library in which imported 360º videos can be edited and interactive actions can be added.
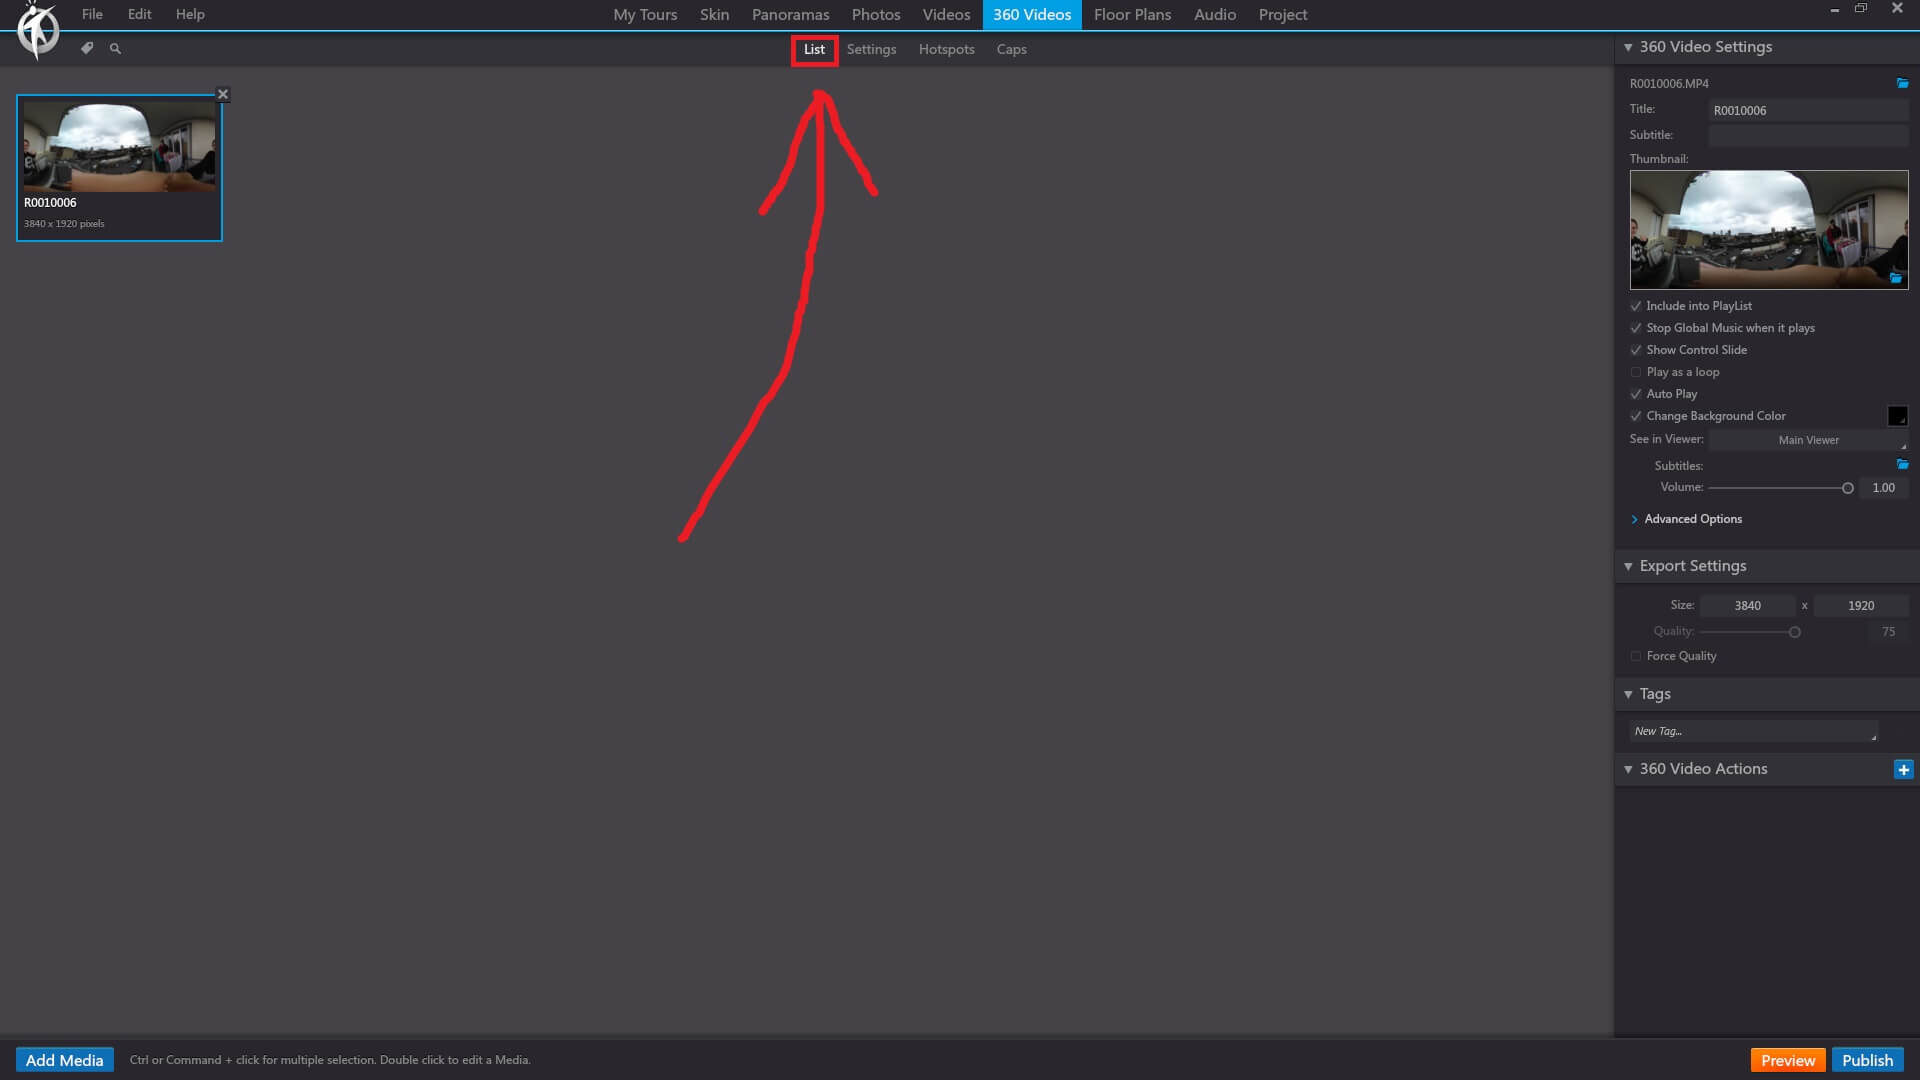
3DVista – 360 Videos – List
In 3DVista, the “List” option under the “360 Videos” section in the toolbar displays a list of all the 360-degree videos that have been added to your project. This list provides an organized overview of your 360-degree video content, making it easier for you to manage and edit these videos.
When you click on the “List” option, you’ll see the following features:
Add Video: By clicking the “Add Video” button, you can import a new 360-degree video to your project. This will open a file explorer where you can select the video file from your computer.
Video Thumbnails: Each video in the list is represented by a thumbnail, which is a small preview image of the video. You can click on a thumbnail to select the corresponding video and access its settings and options.
Video Titles: The titles of the videos are displayed next to their thumbnails, making it easy to identify and locate specific videos in the list.
Edit Video: Once you’ve selected a video from the list, you can click on the “Edit Video” button to access its settings and options, such as playback settings, hotspots, audio, and visual enhancements.
Remove Video: To remove a video from your project, simply select it in the list and click on the “Remove Video” button. This will delete the video from the project, but it will not delete the original video file from your computer.
Using the “List” option under the “360 Videos” section in the toolbar allows you to efficiently manage your 360-degree video content and integrate it seamlessly into your virtual tours.
List within 360º Videos works the same as in other areas such as Panoramas. All imported media is displayed here in a list of thumbnail images. Global image settings can be edited in Lists.
3DVista – 360 Videos – Settings
In 3DVista, the “Settings” option under the “360 Videos” section in the toolbar allows you to customize various settings for the selected 360-degree video within your project. These settings help you create a more engaging and immersive experience for the viewers of your virtual tour.
When you click on the “Settings” option with a 360-degree video selected, you’ll have access to the following options:
Video Playback: Adjust the video’s playback settings, such as autoplay, loop, and initial volume. You can also choose whether the video should start playing when the scene is loaded or when a specific action occurs (e.g., clicking a hotspot).
Video Quality: Set the video quality to be used in the project. You can choose between different resolutions and compression settings to optimize the video’s performance and loading times.
Initial View: Determine the initial view or camera angle that the user will see when the video starts playing. You can adjust the yaw, pitch, and field of view (FOV) to create a custom starting point for the video.
Spatial Audio: If your 360-degree video includes spatial audio, you can enable it here and adjust the settings for optimal audio performance.
Hotspots: Add and configure interactive hotspots within the 360-degree video. Hotspots can be used to trigger actions, such as navigating to other scenes, playing audio, or displaying additional information.
Filters & Effects: Apply visual filters and effects to the video, such as brightness, contrast, saturation, and blur. These adjustments can help enhance the appearance of the video and create a more visually appealing experience for the viewer.
Using the “Settings” option under the “360 Videos” section in the toolbar, you can fine-tune the presentation and interactivity of your 360-degree videos, providing an engaging and immersive experience within your virtual tours.
The experience of the virtual tour can be controlled through the Settings. Presets such as rotation and zoom speeds can be adjusted in the Video Settings window, altering the user experience.

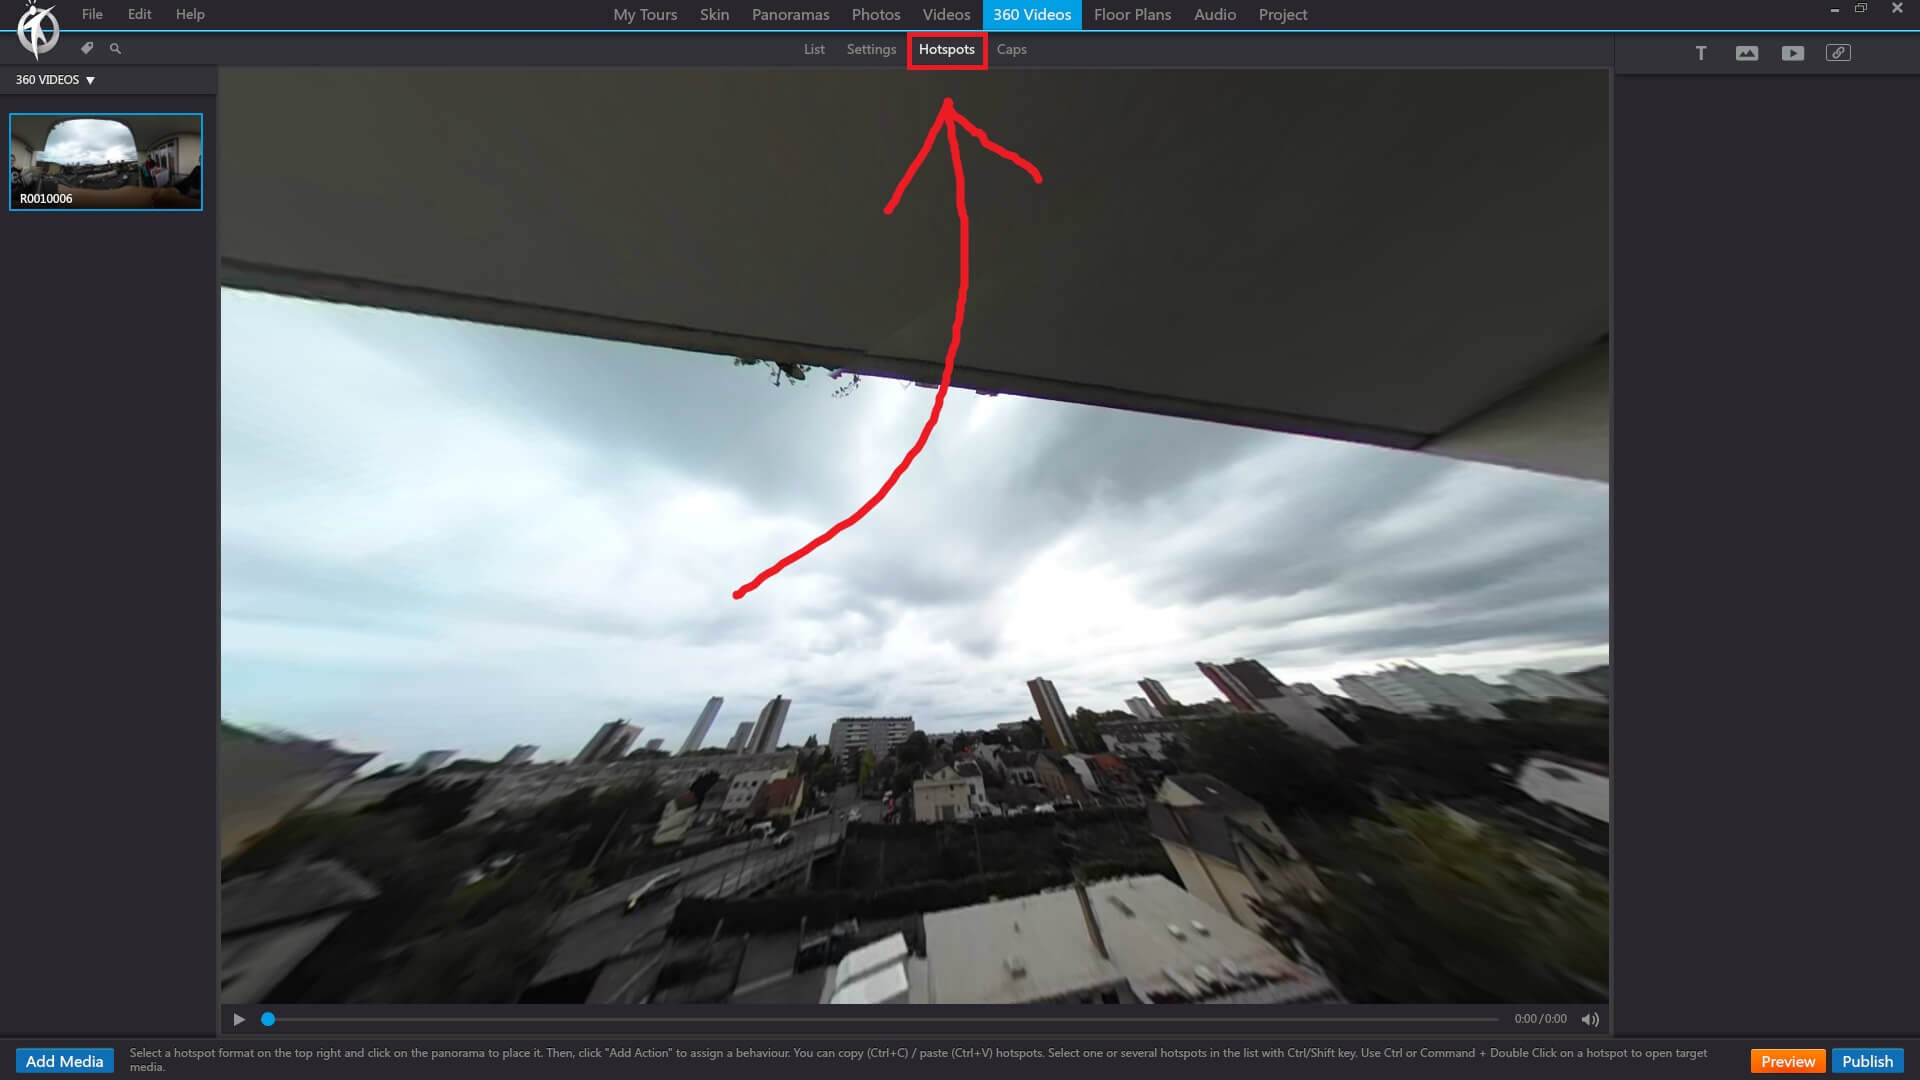
3DVista – 360 Videos – Hostpots
In 3DVista, the “Hotspots” option under the “360 Videos” section in the toolbar allows you to add and customize interactive hotspots within your 360-degree videos. These hotspots can be used to create engaging and interactive experiences for the viewers of your virtual tour, enabling them to navigate between scenes, display additional information, or trigger various actions.
When you click on the “Hotspots” option with a 360-degree video selected, you can perform the following actions:
Add a Hotspot: Click the “Add Hotspot” button to place a new hotspot within the 360-degree video. You can choose from a variety of hotspot types, such as image, text, audio, video, or 3D objects.
Position the Hotspot: Click and drag the hotspot to the desired location within the 360-degree video. You can adjust the yaw and pitch to ensure the hotspot is accurately placed.
Configure the Hotspot: Customize the appearance and functionality of the hotspot by editing its properties. You can adjust the size, color, opacity, and animations, as well as add tooltips or labels.
Set Hotspot Actions: Define the actions that will be triggered when the hotspot is clicked or hovered over by the user. These actions can include navigating to another scene, displaying an info window, playing audio or video, opening a website, or executing custom JavaScript code.
Preview the Hotspot: Use the built-in preview function to test the hotspot’s appearance and functionality within the 360-degree video. This allows you to ensure that the hotspot is working as intended before publishing your virtual tour.
Using the “Hotspots” option under the “360 Videos” section in the toolbar, you can create immersive and interactive experiences within your 360-degree videos, enhancing the overall engagement and enjoyment of your virtual tours.
Hotspots within 360º Videos can be images or icons and used to trigger actions such displaying hidden media or transitioning to other scenes. Hotspots that transition to other scenes are known as location hotspots – essentially creating a portal and linking two scenes. This is how a virtual walk through is created. Hotspots in 360º Videos can also be timed and appear in a scene within a marked time frame. This can be triggered within the right window panel under Key Points.
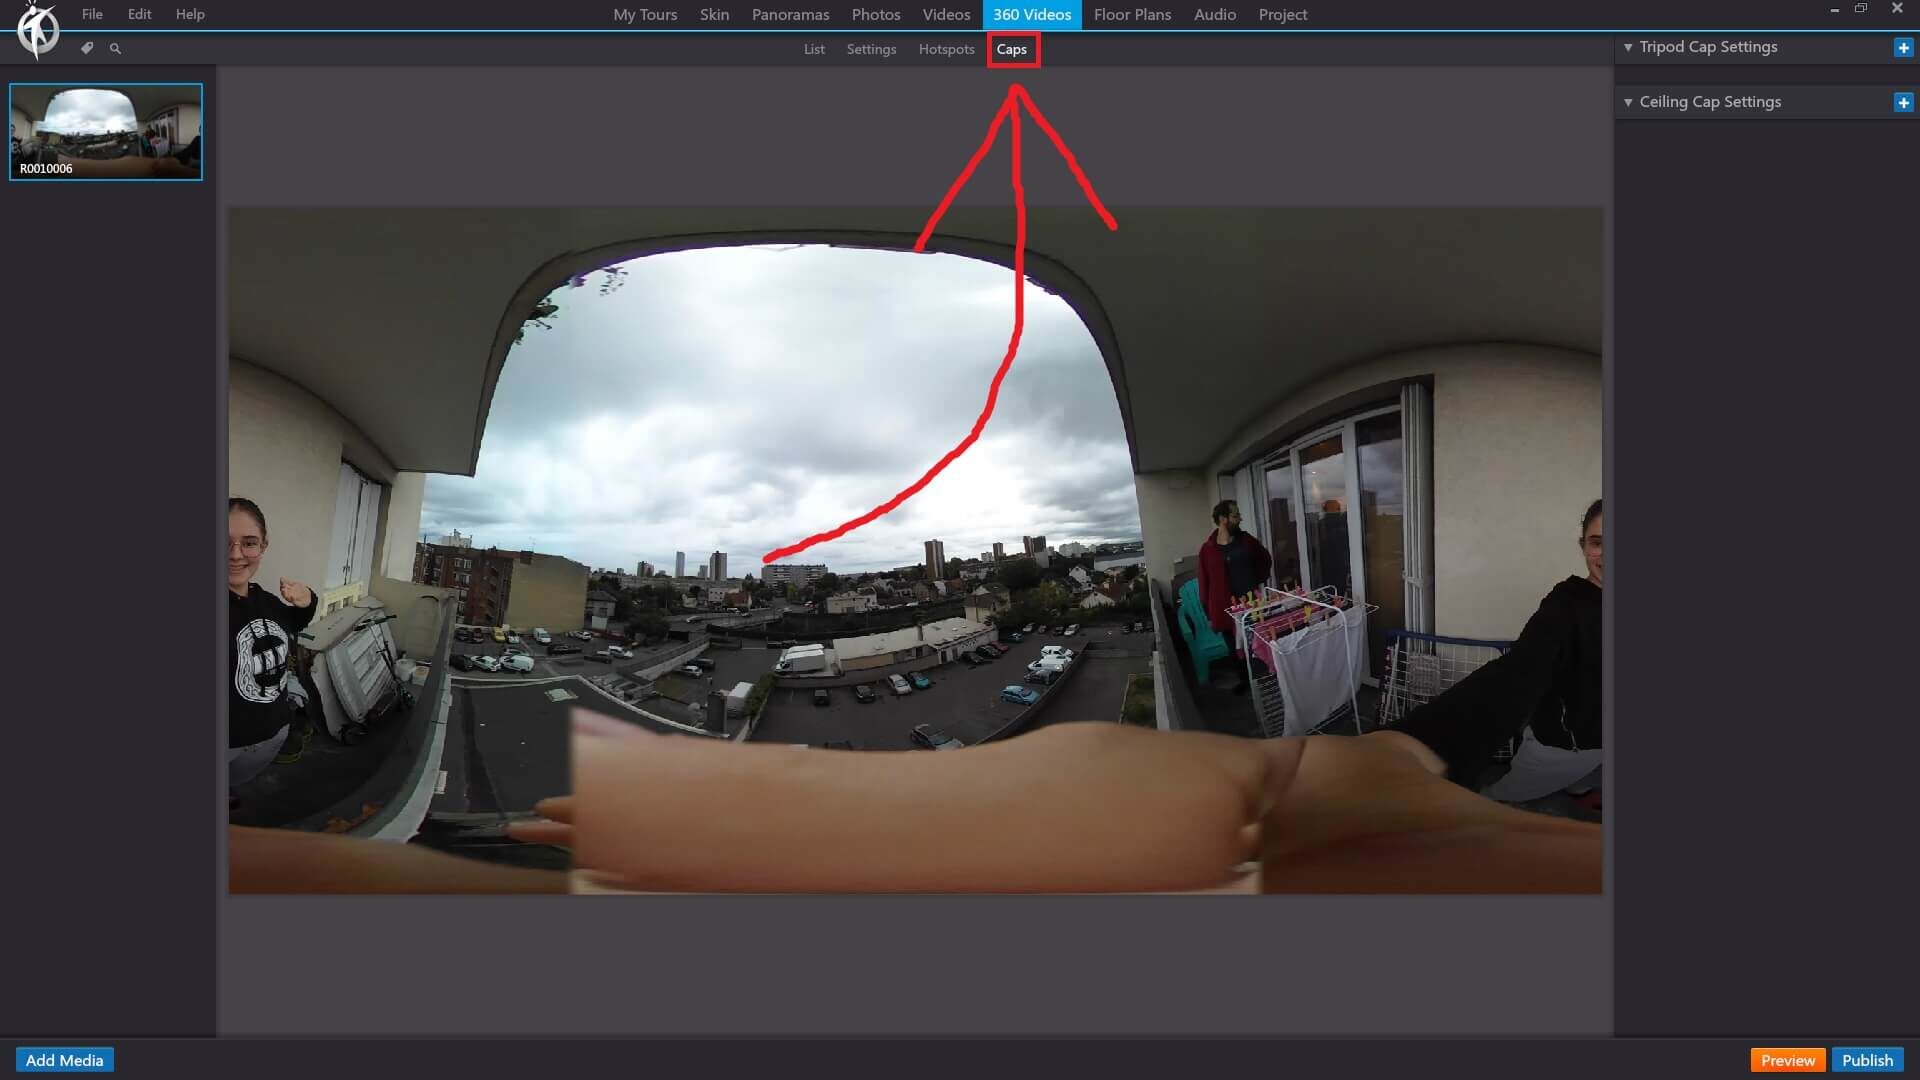
3DVista – 360 Videos – Caps
In 3DVista, the “Caps” option under the “360 Videos” section in the toolbar allows you to add customized caps to the nadir (bottom) and zenith (top) of your 360-degree videos. These caps can be useful for covering camera equipment, tripod shadows, or other unwanted elements in your 360-degree video, resulting in a more polished and professional appearance.
When you click on the “Caps” option with a 360-degree video selected, you can perform the following actions:
Choose Cap Design: Select from a variety of pre-designed caps, or upload your own custom image to use as a cap.
Apply Nadir and Zenith Caps: Apply separate caps to the nadir and zenith of your 360-degree video. You can use the same design for both or choose different designs for each.
Customize Cap Properties: Adjust the size, position, opacity, and other properties of the cap to ensure it blends seamlessly with your 360-degree video.
Preview the Cap: Use the built-in preview function to see how the cap appears within the 360-degree video. This allows you to ensure that the cap is properly placed and customized before publishing your virtual tour.
By using the “Caps” option under the “360 Videos” section in the toolbar, you can enhance the visual quality of your 360-degree videos and create a more immersive and professional virtual tour experience.
The caps feature hides unnecessary details picked up from 360 video photography such as tripod legs.